A lot of users responded to my VS Code color customization post with requests to do something similar in their terminal. Luckily, if you’re a Mac user, there is an option that’s easy to configure and works really well.
Instead of using the built-in Terminal application, I use iTerm2. It builds upon the standard terminal and adds a lot of really nice features like split panes, profiles, triggers and more!
For this post, we’ll be focusing on one of my favorite features, profiles.
Profiles allow you to change the behavior of the terminal window by simply switching the profile you are using. Modifications can include colors, fonts, window size, key mappings, etc.
There’s a hidden option on profiles that’s buried in the Advanced tab called Automatic Profile Switching. The writeup is understandably complex if you look at the documentation. iTerm2 can use information it knows about your current path, host name, and user name to change profiles.
This is exactly what we need to configure the auto switching behavior we are looking for. By cloning your default profile, you can customize the colors however you’d like. Then, using the Automatic Profile Switching, configure iTerm to automatically use the profile when you enter the directory.
Here’s an example of how I have mine setup.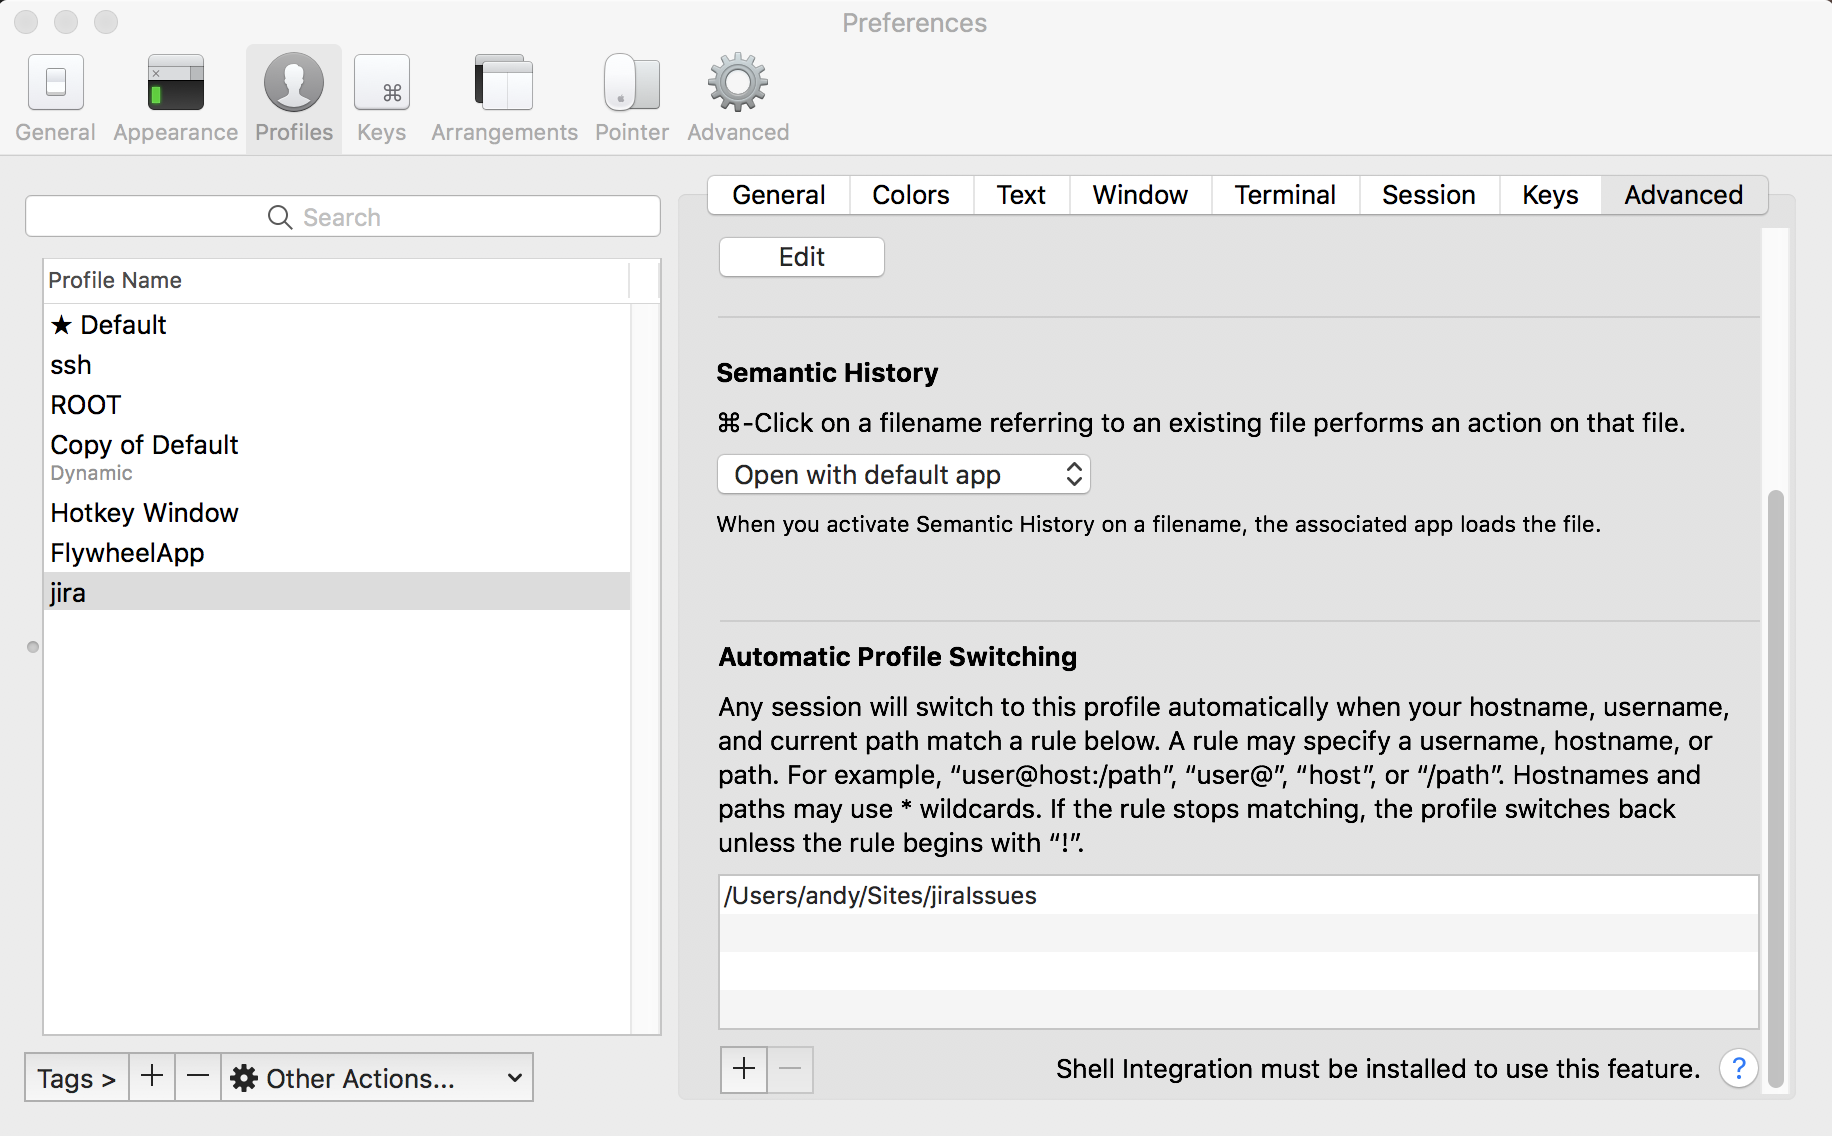
With this setup. Anytime I enter the /Users/andy/Sites/jiraIssues directory, iTerm2 will automatically switch the profile to use jira. You can see this in action in the quick gif below.

As you can see, as soon as I enter the directory the colors change and the jira profile is in effect. When i change back to my home directory, the default profile takes over again.
This method can be used to visually identify when you enter a directory in your terminal session.
Hopefully you found this helpful. Leave a comment below if there’s something I missed.